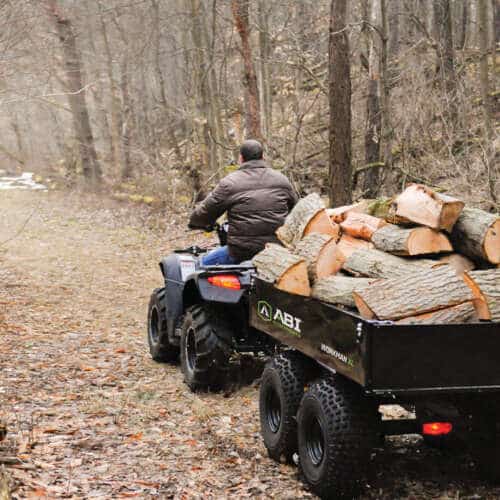
ABI Attachments Workman XL – Assembly Walk-through (Support Video)
ABI Products Shown In This Video
Transcript
When you received your Workman XL Trailer, you’ll notice it’ll be in a box. I’ve already lifted it up on pieces of wood so that you can get your forks under it with a forklift. You’re going to take a simple pocket knife or a Stanley knife, and you’re going to go around. Make sure you’re cutting upward, not inward. So you don’t scratch our Martin Trailer. You gotta cut all the tape all the way around, and then you’re going to open it up. After cutting your tape, simply remove and flip the lid.
Now we suggest that you save your lid, because what you’re gonna want to do is if you’re working in a gravel driveway or on concrete, you may want to flip the trailer over onto the cardboard to keep it safe and not scratch it up while you’re putting it together. After you’ve unpacked everything, you’ll of course have your bed, you’ll have your four tires, you’ll have a set of struts and they both have grease fittings. And then where you can grease them later.
You’ll have a hard work packet of bolts. You’ll have a wiring harness. You’ve got two packs of wiring harness. You’ll have a pig skin to wrap your wiring harness. Some zip ties, your electric actuator, your bed mount rest, your mainframe, your crossbar support. You’ll have your brake axle, your idol axle your tongue. And we now include an optional, extra heavy tongue support. If you’re going to haul heavy loads over rough terrain. Now, to get ready to set up your unit, you’re gonna want to set the bed up. Use your cardboard.
You’re going to want at least two people. You’re going to want to lower it down onto the cardboard. Keep it safe and not scratched up. After you’ve flipped it over, the first thing you’re going to want to do, take a Phillip screwdriver. You’re going to want to remove the blocks of wood before you started assembling. You’ll notice as we’re installing it, here’s our rear tail gate. We want our strut to the back of the tailgate. The axle will be closer to the rear tailgate than it will the front. After you put your strut in place, the first thing you’ll want to do is you’ll have package 8. You’ll take out your nuts and bolts. And what I always suggest is get everything on and started by hand. Then after you’ve moved it around and got everything lined up, then tighten all your bolts afterwards.
Now that we’ve got everything started, what we want to do is start putting our bolts and nuts in. You want to keep a screwdriver handy. Once in a while, some of these are not exactly lined up. Now, if you left your nuts and bolts loose on each end, it’s going to make it easier. So you can maneuver it back and forth as needed to get them lined up. And then again, put everything on, get everything started. Once everything’s done, then tighten it down. All right, tighten these bolts. You’ll need a half-inch wrench. Half-inch socket. Or if you’re lucky enough to have a nut driver use that. It saves you some time. With your strut mounts and your taillight facing away from you, you’ll want to set your crossbar on there. I ran the bolts off previously through the bottom.
You’ll have a washer underneath and the bolt coming up underneath. Then you’ll put a washer and then your lock nut on and repeat the process on the next side. And then you’ll just go back to your half-inch ratchet wrench and tighten these down. You’ll also want to make sure that the angle iron brackets are facing the front towards the break box for assembling the cross model. Alright, for step number six, you’re going to use package C. You’re going to have a washer on the bottom. Then you’re going to put it through. Now, you’ll want to make sure you go to the bottom of the angle irons. So you’ll start your bolt with your washer on, and then a washer and a nut, and you’ll do all four corners and then tighten them down. You’re going to use a 10 millimeter wrench and socket. This is going to be package number C. Step number six. You’re going to install the brake box with the angle iron. You’ll want to make sure the break box is facing the frame, facing downward if you’re putting it together in this direction. All right, so on package D, step seven, you’ll have bolts loose along here. So you can maneuver these around easier. You’re going to take your bolt. You’re going to install a washer. You’re going to line it up, install your second washer on the inside and your nut. And then repeat the process on the other strut. And you’re done with that stuff.
When you’re tightening these bolts, you just want to tighten them down until they’re just snug. This is your pivot point for the bed. So you just want to tighten it down until it’s snug and then you’re set wherever you go. Now we’re onto step eight. Letter E. You’re going to have your bolt holes facing forward because that’s going to mount your electric actuator later. You’re going to take a bolt with a washer, stick it through the hole. Repeat bolt and washer on the other side. And then you’re going to go back with another washer and nut on the bottom of each one and repeat the same thing on the other side and then tighten them down. Okay. When you go to tighten up all of your strut mounts, the best way we found to do it, is start at one end. So you’ll tighten down one end and either the tailgate or the front. So tightened down both sides, then go to the other end, tighten it down. That’ll help pull your frame together because if you notice your standard strut lines on the inside are slotted to make them easier to line up.
So pull it together as far as possible, and then tighten down all of your center bolts on both sides and you’re ready to go to the next step. When you tighten down your bed support, what you’re going to want to do is take your 18 millimeter and your adjustable wrench. Tighten it down just so it’s good and snug. Nylock nuts are self-locking. So you don’t have to tighten down as far as it can. Cause you do not want to slow down the movement because this is the movement for your bed to tip. And then last you’re going to go back up and you’re going to tighten them down with your 18 millimeter, once again, your cross bar, and then you’re ready to go to step 10. Okay. You’ll notice when you get your tires that they’re partially deflated to fit in the box. Okay? Sometimes what that, can cause is, on the sides of your tire, you have the rim angles up and the rubber bead of the tire has to be seated against the rim to keep the air locked in. And if, just cause of pressure bouncing around, you may have lost a bead on your tire.
So if you put air in and it keeps going flat, if you read on the side of the tire, it says maximum bead setting, 15 pounds. So what you’ll do is you’ll take your air compressor, blow them up to 15 pounds inflation. And you’ll hear once in a while, you’ll hear a popping sound. If you hear the pop, what it is, is the rubber tire came out, forced its way on to the bead of the rim. Now, after you ran it up to your 15 pounds, what you can do is deflate the tire back down to your three to five pounds of running air pressure that you actually want in the tires. And step 10, you’re going to get a 16 millimeter and your adjustable wrench. And you’re going to tighten down all four bolts on the cross port. And now you’re ready to go to step 11.
Okay. So now we’re ready to start mounting our actuator. We’re going to start with packet F, the lower mounting hardware. You’re going to need your 18 millimeter socket and your adjustable wrench. You’re going to make sure the motor is facing down towards the bed. I put a piece of paper on so I can do it by myself and balance it. So I didn’t scratch everything up. With a washer on the end, by the head you’re run it in a little ways. Then you’ll take one of your spacers and put it to the outside. Run that through the eye then you’ll add your second spacer on the opposite side. Line it up with the hole, install your outside washer. And then you’re not getting finger tight and then go to the next step. All right, now we’re going to use packet letter G like in girl. Now, if your actuator’s sitting on top, just raise your frame a little bit and set it down. Then you’re going to repeat what you did up front. You’re going to remove your whole spacer, washers. You’re going to put a washer on the outside of the bowl.
Now, before you attach to this, what you’re going to want to do is, I’m going to raise this back up to show you. The main thing you want to do is what’s called setting your limit switch. You’re going to screw this all the way in as far as it’ll go until it stops. And then you’re going to turn it out two complete turns. So one, two, and then raise it back up and down into place. Start your bolt. Put your first base on. Raise it up, line up the hole from the actuator. Get that started. And you’re going to go with your next spacer, put it on. Then you’re going to go with your washer and your nylock nut. And you’ll tighten these down with your 18 millimeter and you’re ready to go to the next step. Step 13 is really simple. You have your wire from the black plastic box and a wire coming out of the actuator. They only fit one way. You can plug them together. Now on all of these plugins, we said in the manual that you use black plastic tape. Also, we send an extra wiring, loom cover. It’s optional. If you would rather tape these together, if you’re doing a lot of offloading and like that with the trailer, you may want to, they fit really tight though. You don’t have to, but you can cover this section with the loom. You’d probably have to cut it around the connectors and then tape everything together.
And same when you do the tongue after you plug the tongue in. If you want to tape them together, so they can’t come unplugged, you don’t have to take it back off and replug them back in because of bouncing around. Okay. You’ll notice you’ll have two packets of hardware labeled H. One is for the front axle. One is for the back axle. Okay? This is the front. Here’s where your tongue goes. So the axle with the brakes goes in the front. Now you might want to have two people. This is a little heavy with the brakes on it. Set it up on the frame, line up your hole. Now the top are slotted. So what you’ll do is you’ll get a washer on top. A washer on bottom. And then you’ll put your nut on. And you’ll do that in all four holes.
Now, what I want you to realize is the swing arm. So if you look there’s an arm on here. The swing arm goes towards the back of the unit on both axles. All right, next, before you tighten the bolts, what you’re going to want to do is you’ve got play in these and they were purposely made that way to make it easier to put on. So you’re gonna want to maneuver it around a little bit, side to side, try and get it split. So it’s as straight as possible running down the frame, then you’re going to tighten the bolt and then you can also, you’ll unwrap your wire for the brakes. And then you’ll notice up in front. There’s the other wire. They can only go together one way. Plug those together. And again for safety, if you want, feel free to take these up. All right, so now we’re ready for step 15. This is your idler axle. Again, your swing arm will face the rear. So what you’ll do, you’ll set this one up on, line it up. Same as the front one. This one does not have any brakes or brake wires. Only the front one does.
Line it up with your holes. You got the other H-pack axle hardware. Don’t confuse it with H-pack for the tongue because that will be coming in last. You put your washer on again, got the bolt through the hole, put your bottom washer. Start your nut. And then repeat that three more times and line it up again. Making sure your spacing is equal on both sides. Tighten it down. And you’re ready to go to the tongue. Before you put the tires on, it’s easy to see, I want you to notice that on both sides of the rear axle, there are greasers. You’ll want to pack those with three or four squirts of grease, annually. Now the front do not have Zerks. The front axle has actual, well, they both have bearings, but that has bearings that you’ll have to hand pat.
So you’ll actually have to remove the bearings and pack them. When it comes to you though, it’s already, pre-greased ready to go. All right. So step 16 is just putting your tires on. You’re going to remove the lug nuts off of each one. I want you to remove all four lug nuts. Then you’re going to put your tire on. Now, when you put your tire on, make sure that you locate the bowel stem. You’re going to want the bowel stem facing the outside so that you’re able to service it to put air in the tires when you need it.
All right now to properly mount a tire, what you want to do, I have a hand tightened all the lugs. So what you’re going to want to do is take one of them and you’re going to want to snug it up, go to the one across from it, snug it up, go to the next one, snug it up and then go to the last one that you haven’t hit. Snug it up. You want to go on a cross pattern. That way you draw the rim on evenly. After you get it snug, you’re going to want to tighten it down. And again, you’re going to tighten it down and cross patterns. So after you get all the way tight, then you can go to your next lug. Now, once you flip it over and get it setting on the wheels, you might want to go back and hit it just a little bit to make sure they’re all tight, but again, always tightening it in cross pattern.
All right, step number 17. You’ll notice you have blocking black, brown, yellow, and white. You’ll notice inside you have a female on one, and three males on the other. We’ve got three females and a male. So those will get plugged together, before you can put your tongue on. Then you’ll have a yellow, orange and green, and that’ll only plug you in one way so you can plug those in. Now, again, this is optional. If you wish, you can tape these together, just to make sure you have a better fit so they don’t come apart while you’re moving. All right. So these is where we found, you’ll notice there’s a rubber grommet set in here. The smaller one will fit easily in the rubber grommet, the bigger one won’t. So the easiest way we found take the rubber grommet off, put it to the back of the plug.
After you get it past the plug, then you can fish the wire into the unit. Once you have the wiring all the way in, then you’ll replace the rubber grommet back on to keep your wires safe from getting cut. Okay, now take the grommet off the other side. Slide the grommet as far back as you can. Start feeding the wires into the tube. Okay. Step 18. You’re going to want to make sure that your hitch is pointing towards the sky. Your ball hitch receiver. and this is easier with two people. So I got a helper here.
He’s going to raise up the hitch and help me get it aligned. And then you’re going to start your bolts through. And we had a washer on the outside of the bolt head. We’re going to put a washer and a nut on the other side. And then you’ll simply tighten all four down and you’re ready to go. Step 19. You’re going to pull the excess wire out. You’re going to run this down and run it through the safety clip. This is used to help it if you forgot to look it up or unhook it to help it so hopefully you don’t rip your wires out. Okay, Step 20. Make sure before you flip it over, switch your tailgate panel on the side you’re flipping it to out of the way. Make sure your D-rings aren’t caught because if they’re in solid, then you’re going to better your friend. Now you’re going to need two people.
And you’re going to lift. Set it down. One person on each side. You’ll want to step and you’ve got your trailer built.
