Answering Your Questions – Arena Renovation I ABI Dirt
Transcript
Hi, everyone. Matt Metzger here with ABI Attachments, welcome back to another episode of ABI Dirt. Today’s episode is another Q&A session. You all have been phenomenal about getting us comments and questions and feedback on our social media channels. Thank you so much for that. And we are looking to get you some answers today. So let’s jump right in.
Karen, great question. I am so glad you’re keeping an eye out on the scarifiers tips on your ABI product. So great news. Actually, we now have some basic parts available for purchase online so you can visit shop. There are a couple of wear parts there. If you don’t see the parts that you need on that site, just give our customer service team a call. They would be happy to give you the hookup on whatever parts you need. Bonus tip for anybody who has a scarifiers tips on your ABI product. Make sure to catch them and replace them before they wear into the shank. So take a look at your tips. Make sure to swap them out before they wear into the shank. That way you can save some money and just buy the tips and not buy the shank. Karen, great question.
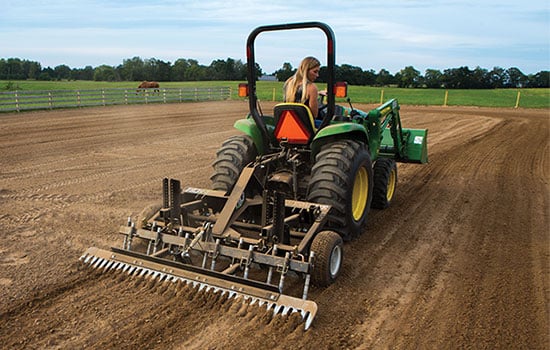
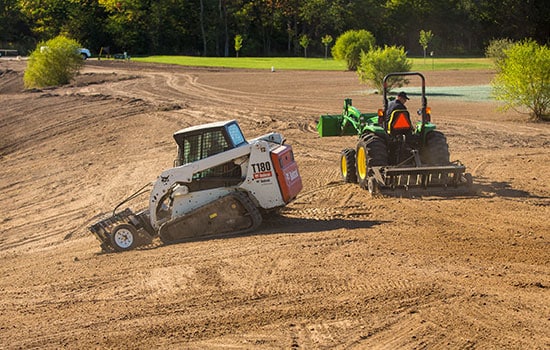
Becky, I love this question. You and I could sit and talk all day about how to best tackle this issue. So I’m going to give you one resource first, and then I want to talk about kind of the principle of the problems you’re facing. So in the description of this video, you’re going to see a link to an arena renovation video by my colleague, Mike Rheem. And Mike spent some time walking step by step in a local arena here, just right around the corner from us on how to tackle the exact situation you’re working with. So please take a look at that for an in-depth guide. But I want to give you kind of a big picture for the sake of the time that we’re working here on this episode of ABI Dirt. You’re working with both mixing and leveling. And it’s two primarily different functions, which means it’s two major different components on your on your arena drag.
So first, we’ll talk about mixing. When you are trying to mix in new material. Keep in mind that professional arena renovators are going to take out all of the material in your arena, put it in a concrete mixer. Add in the new material. Mix it all up for a while and then dump it all back out. Now, the vast majority of us aren’t renting a concrete mixer, and we’re not taking the time to pull out that footing, mix it up and put it back in. So the best that we can do and it kind of a do it yourself arena renovation scenario is use a vertical component in order to agitate the material. This is why ABI products have scarifiers and grooming rods. It’s an aggressive vertical motion that takes whatever material you’ve got and pulls the material up from the bottom and also allows that new material you’ve got on top to mix down in. I mean imagine a mixer in a bowl in the kitchen. Right. So you need to take an order to get things mixed in really well. First, obviously make sure you know that your base is clear. You’re not going to bugger up any base but take whatever your vertical component is. Take everything else out of play and just run to that arena in a vertical pattern. For those of us who played with slinky as a kid, I imagine taking a slinky, pushing it over sideways. And it’s those tight concentric circles just up one side of your arena and down the other. That’s the ideal drag pattern in a situation where you’re trying to mix the material in. Again, the video by Mike. He talks through step by step. But when it comes to mixing, that’s the kind of action that you need taking care of.
Now, leveling is a whole new ballgame. Now we’re switching over to the component of your tool that pulls material. That’s the Leveling blade on the TR3 and the TR3 E-Series. For an Arena Rascal Pro, you’re looking at that mini box that fastens up to the Finish rake and you need something that can carry material. This, again, professionals will pull everything out steamroll it, they’ve got lasers, the whole setup, and we’ve got tools that can do that as well. But for most of us, you’re doing kind of a DIY doing it yourself. This requires a little bit of work. I’m not going to lie to you, Becky. This requires a lot of intentionality on a three point tool. You’re looking at actually manually raising and lowering your three point attachment. So you lower the tool down, grab high spots, drive toward low spots, pick the tool up and leave your material there. On a tow-behind tool, hopefully you’ve got that electric actuator on Arena Rascal Pro. That way, as you come to a high spot, you drop the tool down, you grab material, you drive straight toward a low spot. Pick the tool back up and leave your material there. It won’t be pretty at first. It’s not going to be pretty in the leveling process. Don’t worry about pretty. You can catch it on your last and your final grooming pass. Again, Mike talks through all the details. But that kind of talks the principle of what you’re working with. Two separate components, two separate passes. You’re working in material, the first step and then you’re leveling it back out. Becky, really great question. Love talking renovation.
You bet, 100 percent. Absolutely. We work with shipping carrier services so that we can take our products directly from our factory where I am right now in northern Indiana and ship directly to your driveway, right to you. Now, in future episodes, I’m hoping to get out to our dock. That way, you can take a look at what the products look like before they leave the facility, because it’s a little bit interesting how to take a tractor attachment that’s eight feet wide and weighs 700 pounds and get it directly to you. Spoiler alert it doesn’t fit in the U.P.S. box. I’m also going to put a link in the description of this video below that talks through the offloading process. So if you’re curious about what it looks like to receive an eight foot wide, 700 pound tractor attachment off a freight truck, you can take a look at that video and it gives you a good idea of how we go about the process. Great question.
Joe, you win the Keen Observation Award for today and today’s Q&A episode. Absolutely. Great observation. You’re right. If you take a look at the egg tread on your tractor and the egg tread on those classic spreader ground drive units, we’ve got a facing the opposite direction come down to one reason, and that is traction. We want those tires to have as much grab, as much purchase as possible, because remember, on those ground drive spreaders, the motion of those components that make everything do the magic that they do relies on those tires having a really good grab. So we switch the tread around. It can grab the soil better. Better rotation, better motion throughout those ground drive components. That’s a really good question, Joe. Thanks for asking.
That’s all the time we’ve got for today’s Q&A episode. I hope the information was helpful for you. If Becky’s question about arena renovation and mixing a new material and leveling out the highs and lows, if that got you thinking that maybe your chain harrow isn’t quite cutting it anymore and you want to give us a call. Remember, our factory reps are available to you to answer all of your arena questions. They’d love to work with you, but until next time, everyone take care


