
How to Restore Your Gravel Driveway
Repairing A Gravel Driveway
Is your gravel driveway looking a little worse for wear after the winter months? Matt’s got you covered with three steps to getting your gravel driveway back in tip-top shape.
For more information on these or other attachments visit us at abiattachments.com or call a Product Specialist at 877.788.7253
ABI Products Shown In This Video
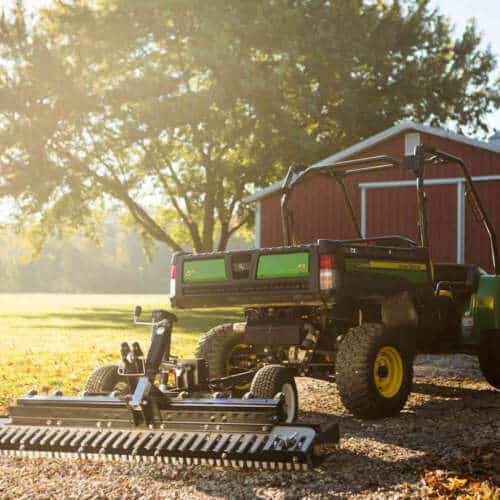
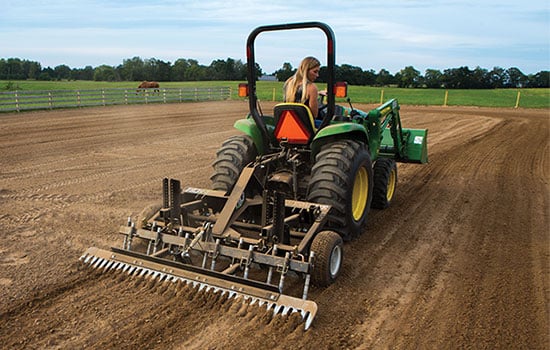
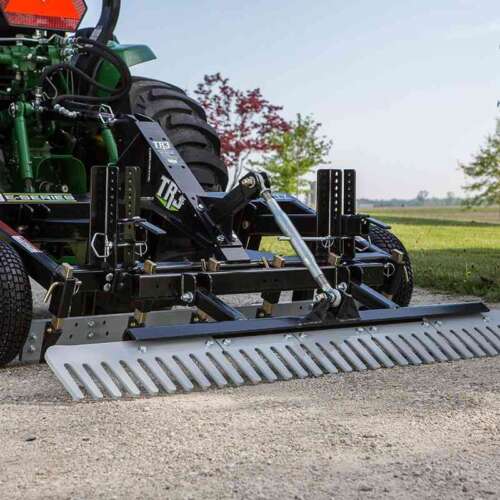
ABI Gravel Rascal Pro
- For ATVs, UTVs, & Sub-Compact Tractors
- 4.5', 5.5', 6.5', & 7.5' Widths
- Starting At: $94/mo.*
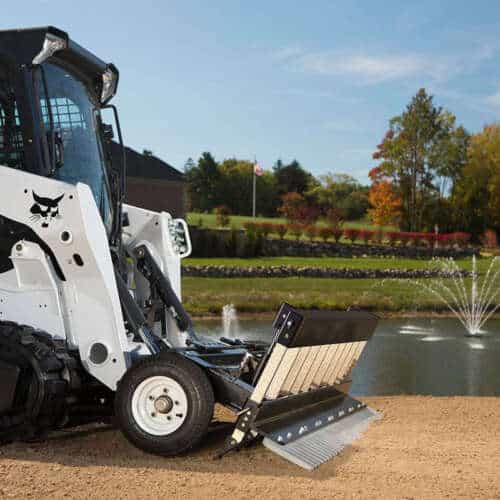
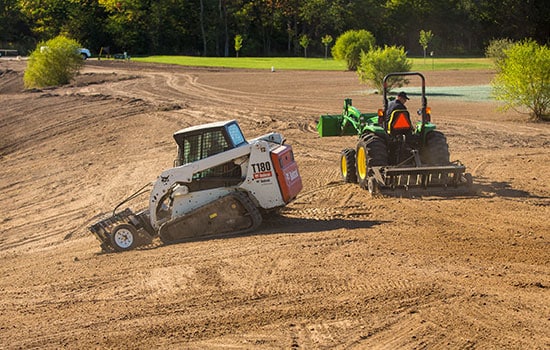
SR2 Grading Rake
- For Skid-Steer Loaders (SSL)
- 7.5' Width - Commercial-Duty
- Starting At: $161/mo.*
Transcript
Hi, everyone. Matt here with ABI Attachments. Welcome back to the “ABI Dirt.” Got a question for you today. How’s your gravel driveway looking? Because if it’s anything like the gravel driveways around here, now that it’s starting to turn to spring, we’re seeing a lot of potholes, we’re seeing a lot of washboarding, and we’re starting to see some vegetation pop up in the middle of that driveway, looking more like a two-track than anything else. Well, you know that we love talking driveways. We love talking how to get rid of potholes and to give you a smooth drive to and from your property. And that’s the topic of today’s episode, a quick three steps on how to get your driveway back.
Step 1: Loosen Your Gravel Surface Up
Step one, you’ve got to loosen things up. Now we talk a lot about potholes around here and how to get rid of them and getting to the bottom of the pothole, but what exactly does that mean? Remember, anytime you’re dealing with some washboarding or some potholes in a gravel surface, whether it’s a gravel driveway, a gravel lot in front of the barn, if you’ve got a depression there, it’s going to be heavily compacted, not just at the bottom of that pothole but on the side walls as well. Which means when you loosen up your gravel drive or the gravel lot, the gravel surface, you can’t just kind of scratch across the top. You’ve really gotta get all the way down to the bottom of that bowl. The lowest point has to be loosened all the way down to that low spot. Now you could grab your grandpa’s pickaxe, you could grab a shovel, you could grab a straight rake. That’s gonna take some time. That’s a lot of labor on your end. There are also a number of attachments on the market that are kind of lightweight, easy-to-use attachment that just kind of float across the surface. That’s also not quite getting done what you need to get done. You need to grab a gravel driveway implement, ideally, something that connects to, I don’t know, a piece of machinery you already have, like a four-wheeler or UTV, a tractor, something you can connect up that has enough weight, that has enough resistance that you can dig deep and actually get to the bottom of the pothole, get to the bottom of the washboarding so you can loosen things up.
Step 2: Grade & Crown Your Driveway
Step two, after you’ve loosened up your surface, again, gotten all the way down to the bottom of pothole or washboarding, it’s time to grade your gravel lot or driveway. Now there are a lot of ways to go about this, but before you start trying to level things out and move things around, it’s not always about level. Sometimes you’ve gotta follow the contour of your plane, whatever you’re working on. Now you could have a driveway that slopes from the road up to your property. Maybe it’s slopes sideways, right? You’re on a little bit of an incline. Whatever your situation is, pay attention to that contour. Now the contour is typically also informed by where is your water going? If you’re in a situation that you’ve got kind of low spots or ditches on either side of your drive, you may wanna consider crowning your driveway. And there are ways to do that depending on what gravel driveway attachments you’ve got, so that the highest point in your drive is actually the middle of it. It requires a little bit of technique, a little bit of finesse, and that’s where our customer service team is fantastic about helping you dial that in. But it is actually possible to crown your driveway so that water sheds, because again, the whole reason you had potholes and washboarding is because water sits and stays on the drive. So you need to have some kind of slope, whether that’s a crowning in the middle of the drive, or if you already have a natural contour to your driveway, you may be able to keep that driveway even with that contour so water can just shed right off to the side. So once you’ve loosened things up, stop, look, take a look at the terrain, take a look at the contour of your property and match your driveway up to it.
Step 3: Firm Finish For Curb Appeal & Driving
Step three, final step in this process is to finish. Now finishing is more than just getting a nice pretty look, although that’s nice too, right? I mean, at the end of the day, once you’ve worked on that drive, it’s awfully nice to sit on the front porch, take a look and see how beautiful that drive is from the property out to the road. Get that curb appeal going for you. But when you’re finishing, when you take that component on your attachment that is making that last pass, what you’re actually doing is you’re pressing that gravel together and you’re taking some of the air out from in between those gravel components. And that means that you’ve got a firmer finish to drive on. Because what you don’t want is to keep everything so loose that as you’re making those first couple of passes up and down your newly loosened and greater driveway, you kick the loose gravel right back into your lawn or back into the ditch. So that last pass is so important, not only to make it pretty, but also press the air back out.
Get Your Driveway Back
That’s all I’ve got today. I hope this has been a helpful process for you. Now for those of you who own ABI Attachments, whether it’s the TR3 line, or the SR line, or maybe it’s one of our Rascal lines, or TR3 E-series, you know that our attachments are specifically designed with this three-step process in mind, and you personally experience the benefits of using these attachments to clean up your drive, especially in this kind of spring season. So we would love to see you tag us in your posts. If you’ve got videos, if you’ve got before and after images from using an ABI product, we’d love to see it. And if you don’t have an ABI Attachment and you just wanna show us what your drive looks like so you can ask some questions about the best way to tackle it, we would love to hear from you as well. So either way, you know that we’re gravel and dirt enthusiasts around here. Throw a picture in the comments, throw a picture on your socials and tag us in so we can get eyes on it. We would love to see it. We would love to work with you. Until next time, everyone, take care.