
TR3 E-Series – Initial Set-up
Transcript
Welcome to the ABI family. And congratulations on the purchase of your TR3 e series. Each ABI tool comes with a custom built palate. For residential deliveries, a liftgate will help you to offload your new ABI tool. The driver will then lower the liftgate to the ground for easy offloading. Remove the pallet from the liftgate by connecting a toe strap or chain to the pallet and use a vehicle suited to pull the weight of the tool. Verify nothing is missing or damaged on your order. If anything is missing or damaged, sign the shipment as damaged and call the ABI support team. Once all is accounted for. Remove your new tool from the pallet. Tin snips may be needed to cut the metal banding that secures your tool to the pallet.
Next, connect your TR3 E-series to the tractor and let’s get ready for setup. Connect the top link and lower arms in the top two holes on the tool. For those who are loading and unloading your TR3 E-series off of a trailer regularly, the lower hauls will give you the cleaners to do so.
Each TR3, each series is shipped with a complimentary 20 inch top link, but feel free to use your own. Some tractors require a smaller top link, so connect accordingly. If you’re using a subcompact tractor, you may need counterweights to be able to use your ABI tool. Please consult your tractor’s owner’s manual to confirm. Additionally, for subcompact tractor owners, you will need to adjust the speed of your three-point hitch system so it runs as slow as possible.
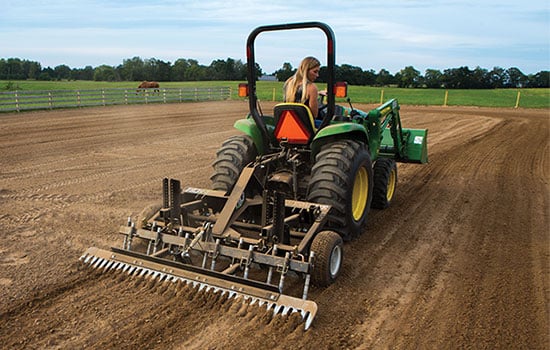
Before we set up your tool, check to see where the wheels are currently set. There are three different wheel positions. The bottom setting is the standard everyday maintenance position. The center setting can be used for more aggressive renovation work, and the top setting enables maximum working depth for specialty applications. Moving the wheel location may require you to adjust the leveling blade. To get your new tool into proper setup, you will use the top link to level out the tool, turn the top link to contract or extend it until the upright towers of the leveling bar are perfectly vertical.
Next, you can adjust the finish rake on the back of the tool. The Finish rake is adjusted using the small top link that connects to it. To achieve proper adjustment of the rake, you will adjust it so you are always carrying some material on the rake, creating the signature ABI finish on your footing. All of the components on your TR3 E-series can be adjusted individually to setup your desired depth.
Scarifiers are used to rip through material and remove compaction. They are primarily used in renovation work and should be taken out of play for daily grooming. Grooming rods are your primary component for everyday grooming and can be adjusted to a depth of up to six inches. The leveling blade can be adjusted to be pinned out of play or pinned down to carry more material. This is accomplished by inserting the pin above or below the arms of the leveling blade. With the pins taken out, the leveling blade will have the ability to float up or down, giving the TR3 E-Series its unique leveling ability. The patented Profile blades adjust in 1/2 inch increments to a maximum depth of four inches.
Now, that setup is complete. They are ready to start using your TR3 E-series.